STENCIL.ONE
How to Storyboard Your Film: Real Hollywood Scene Breakdown
Beautiful shots don’t happen by accident. Powerful scenes are never pieced together as an afterthought.
![]() Software version 1.1.1
Software version 1.1.1
How to Storyboard Your Film — The Method That Separates Pros From Amateurs
It’s not uncommon for indie filmmakers to spend months writing their script. Weeks scheduling the shoot. And then when it comes time to watch the final cut back, the scenes they could picture so vividly in their imagination look flat. Rushed. Amateur.
In more cases than not, that gap exists because there was no concrete plan for the images themselves.
Storyboarding is the process of translating what’s in your imagination onto paper or into digital software, shot by shot. It lets you see how your film will come together before you capture a single frame, and it lets you experience your story from your audience’s point of view before you even have an audience.
Beautiful shots don’t happen accidentally. Powerful scenes are never pieced together as an afterthought. They are the result of deliberate, meticulous planning. The storyboard is the tool that makes that planning possible.
In this tutorial we’re going to go beyond the basics. We’ll deconstruct a real scene from House of the Dragon — three actors, one room, just a conversation — and look at exactly how the shot choices were planned to make that conversation hit as hard as it does. I’ve embedded the official clip below so you can watch it and follow along.
What Is Storyboarding and Why Does It Matter
Before we get into any tool or template, it’s worth stepping back because storyboards are not just a sequence of cool images stitched together. Every shot is a decision. And those decisions, made intentionally, are what separate a scene that feels professional from one that feels amateur.
There’s no single right way to storyboard. The two most common approaches are pencil and paper, where you sketch each shot in rough and match it to a section of your script, or a digital tool like Stencil, which is what we’ll be using in the walkthrough below. If you prefer pencil and paper, here is a free downloadable storyboard template. Either way, everything here applies to both approaches.
Deconstructing a Real Scene From House of the Dragon
The scene we’re breaking down is from House of the Dragon, Season 2, Episode 2. Three men in one room. Aegon, the young king. Otto, his grandfather. Cole, the knight. Just a conversation. But the shot planning in that scene is doing as much storytelling as the dialogue itself.
The Opening Wide Shot
The scene opens on a wide shot, all three men visible in the same frame. That opening wide shot is doing several jobs at once.
First, it’s orienting the audience. We need to understand the geography of the space before we can understand the relationships within it. Where is each man standing? Who is closest to the door? Who is centered in the frame? All of that spatial information tells us something about power before a single word is spoken.
The second thing that wide shot is doing is establishing the status quo. Otto is the Hand of the King. Cole is a knight. Aegon is the king. That opening frame is a visual statement of how things are supposed to be. The rest of the scene is going to systematically dismantle that.
Your first shot tends to be wide. It’s the least emotionally intimate of all your shot options, and that’s exactly what you need at the top of a scene.
You are not trying to make the audience feel something yet. You are trying to orient them so that when you do go for emotion, they know exactly where they are.
Why the Shots Keep Jumping in the Middle
Here’s where it gets interesting. Watch what happens in the middle of the scene. The director is not staying wide. They are cutting between wide, medium, and close-up constantly. Otto is mostly alone in his shots, showing his isolation. Cole often appears in Aegon’s shots, showing his alignment.
During the moments when Otto is speaking calmly and in control, notice that the shots tend to be a bit wider. A wider shot creates psychological distance. It’s cooler. More composed. It reflects Otto’s authority and his attempt to manage the situation rationally.
But then when the dialogue gets more charged, when Aegon pushes back, when the tension between grandfather and king starts to surface, the director cuts closer. A close-up removes all the breathing room from the frame. There is nowhere for the eye to go except the face. And a face under pressure is one of the most powerful images in cinema.
You are using the camera as a sort of emotional thermostat. Wide shots cool the temperature down. Close-ups turn the heat up.
The rhythm of how you cut between them is what gives a scene its pace and its breath. Too many wides in a row and the scene feels slow and distant. Too many close-ups in a row and the audience starts to feel claustrophobic. The variation is the craft.
There is also an eyeline principle at work here. When Otto speaks to Aegon, we cut to Aegon listening. These are motivated cuts, the edit is following the emotional logic of the conversation, not just covering the dialogue mechanically. Every cut is asking the question: whose experience matters most right now?
How the Final Two Shots Bring It All Together
The final two shots are doing something extraordinarily deliberate.
The second to last shot is a close-up on Otto. The tightest we have been on him in the entire scene. He says: “Do you not think of your father. His forbearance. His judiciousness. His dignity.” He is not just giving advice. He is making a final appeal. He is invoking a dead man as his last available argument. The close-up tells us this is everything Otto has left. This is a grandfather, out of moves, making one last plea to the boy underneath the crown.
And then we cut to Aegon. A medium shot. “F&*# dignity. I want revenge.”
Otto’s last desperate appeal is a close-up — intimate, exposed, vulnerable. Aegon’s answer is a medium shot — cooler, more composed, more certain.
You’ll often hear that scene endings should rhyme with scene openings. It doesn’t mean they look the same. It means they are in direct conversation with each other. Your opening shot makes a statement about the world. Your closing shot answers it. If you toggle from your first shot to your last and nothing feels different, the scene has not done its job.
How to Build Your Storyboard in Stencil
Once your shots are planned, you need somewhere for them to live. Here’s how to do it inside Stencil.
After logging in, click on the project you want to create a storyboard for, then click on ‘script’ in the sidebar. This will bring you to you our screenwriting software page. One of the most powerful things about Stencil is that your storyboard images live in close proximity to your script. Traditionally, filmmakers would work in one tool to write their story and another tool to visualize it. Stencil brings both together, so as you write, you can map your story to specific storyboard images that sit just above your script.

You can also get more granular by creating animatics and associating specific dialogue or scene text to each image, giving you a frame-by-frame visual plan for the entire scene.
How to Use AI to Generate Your Storyboard Images
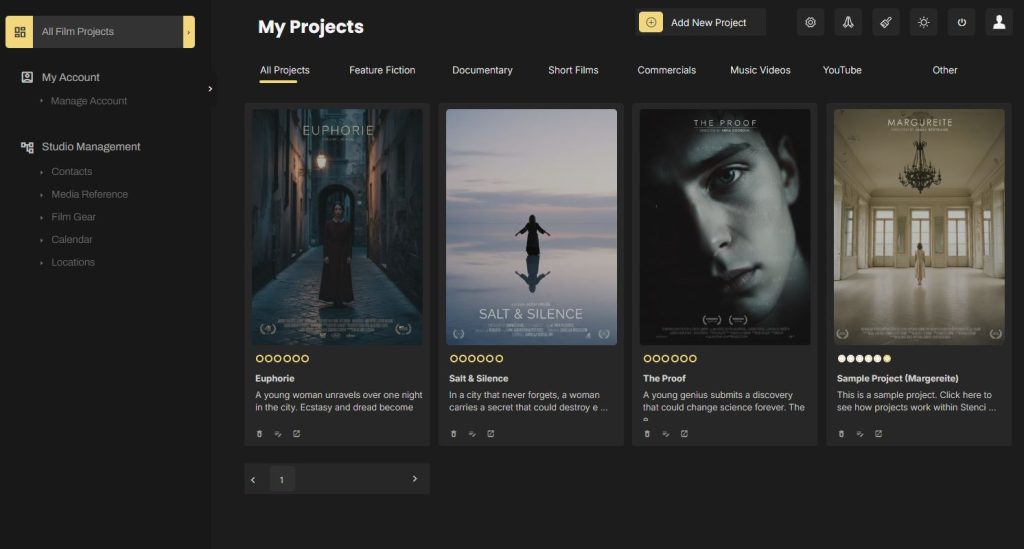
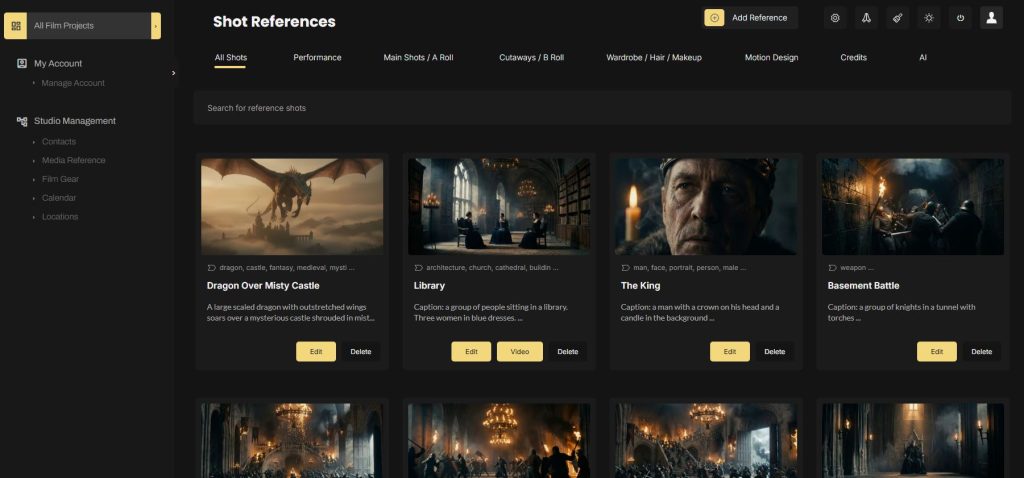
Creating storyboard images inside Stencil starts on your main project page. From there, click on ‘media reference’ in the sidebar. Here you can either upload reference images you love, or use the built-in AI image generator to create storyboard images from a text prompt.
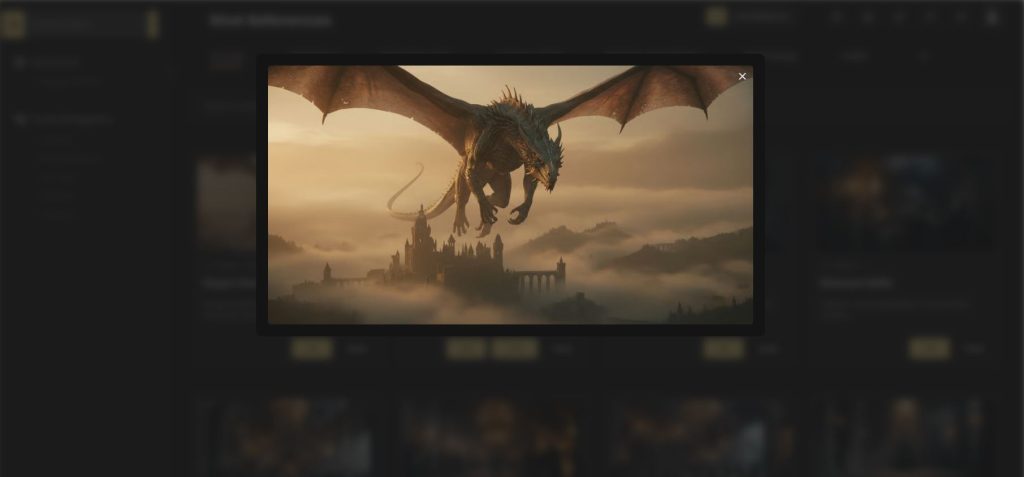
The prompt optimization tool lets you select your lighting, camera angle, color palette and more before generating. If you already have your locations locked, you can take things a step further by uploading a photo of your actual location or actors and have the AI generate a cinematic storyboard image based on your real production environment.
You could just describe your scene and have the AI generate the storyboard images for you — or upload a picture of your location and have it generate an accurate, cinematic shot that represents where you’re actually shooting.
Once generated, images are automatically tagged with a title, description, keywords and colors, making your library searchable as it grows.
Linking Your Storyboard Images to Your Script
All reference images created in Stencil start as global studio assets, not yet tied to any specific project. To associate them with a project, head to your project page and click on ‘media reference library’. From there, select the images you want to add to that project.
Once linked, you can pull those images directly into your script page by clicking the ‘library’ option on any shot. Select your image, give the shot a name, and save. Your storyboard image will now appear in line with your script, giving you a full visual overview of how the scene will play out on screen.
You can drag and drop the position of any storyboard item at any time as your plan evolves.
Using Your Storyboard on Production Days
Storyboards aren’t only useful in pre-production. Inside Stencil, you can switch to a list view to see your full shot list with lens choice, camera movement, framing details, shutter speed, ISO and more.
When you’re on set and actively working a shot, you can mark it as your active shot. Once it’s in the can, mark it as complete. A simple dropdown lets you see at a glance which shots are done and which are still outstanding.
The filmmakers who consistently punch above their budget are almost always the ones who did the most planning before the camera rolled.
Start Storyboarding Your Film
Think back to that scene from House of the Dragon. Nobody on that set was guessing. Every image was planned. And that planning is exactly what made those images hit as hard as they did.
That is what storyboard software gives you. It takes the scene that lives vividly in your imagination and gives it form before you ever pick up a camera. It is the bridge between what is in your head and what ends up on screen. And without that bridge, the gap between your vision and your final cut is a game of chance.
So spend time in pre-production with your storyboard. It will save you considerable pain in production and post.

All-In-One Film Production Software
Stencil comes will all of the tools you need to manage your film production studio. We help you manage storytelling, budgeting, casting, location scouting, storyboarding and so much more!
![]() Software version 1.1.1
Software version 1.1.1
![]()
A software solution designed to help filmmakers complete compelling stories.
![]() Version 1.1.1
Version 1.1.1
USE CASES
Feature Films
Documentaries
Shorts
Music Videos
Commericals
Fashion Films